Braising Science — Collagen-to-Gelatin Conversion, Low-and-Slow Mechanics
Complete braising reference with collagen conversion rates by temperature, braising cut selection data, liquid ratios, vessel comparison, and altitude adjustments for consistent results.
What Do You Actually Need to Know About Braising Science?
What are the common mistakes, the precise measurements, and the science-backed techniques that separate reliable results from guesswork? This guide provides the reference tables, ratio calculations, and decision frameworks for braising science — organized for quick lookup and practical application.
Collagen Is the Entire Point
Braising exists because collagen-rich cuts are cheap and become extraordinary when cooked correctly. Collagen — the triple-helix protein comprising 25-35% of total protein in connective tissue — begins denaturing at 55°C but converts to gelatin only when sustained heat breaks the hydrogen bonds holding the triple helix together. This conversion is both temperature-dependent and time-dependent, and getting it wrong in either direction produces bad food.
The gelatin produced is what creates the unctuously rich mouthfeel of properly braised meat. It dissolves into the braising liquid, thickens the sauce, and lubricates the muscle fibers that would otherwise taste dry and stringy.
Collagen-to-Gelatin Conversion Rates
The relationship between temperature and conversion time is non-linear. Higher temperatures accelerate conversion dramatically, but temperatures above 90°C cause excessive moisture loss from muscle fibers.
| Internal Temp | Time to 50% Conversion | Time to Full Conversion | Moisture Loss | Texture Result |
|---|---|---|---|---|
| 60°C | 24 hours | 48+ hours | 8% | Sliceable, pink center, tender |
| 68°C | 8 hours | 18 hours | 12% | Firm but yielding, classic braise |
| 75°C | 3 hours | 8 hours | 18% | Fork-tender, fibers separate easily |
| 80°C | 1.5 hours | 4.5 hours | 22% | Very soft, begins to shred |
| 85°C | 45 minutes | 2.5 hours | 27% | Shredding, approaching pulled texture |
| 90°C | 25 minutes | 1.5 hours | 33% | Dry if held too long, narrow window |
The sweet spot for most braises is 80-85°C internal temperature, held for 3-5 hours. This gives you complete collagen conversion with acceptable moisture loss. Going to 90°C saves time but the margin between “perfectly done” and “dry and chalky” narrows to roughly 30 minutes.
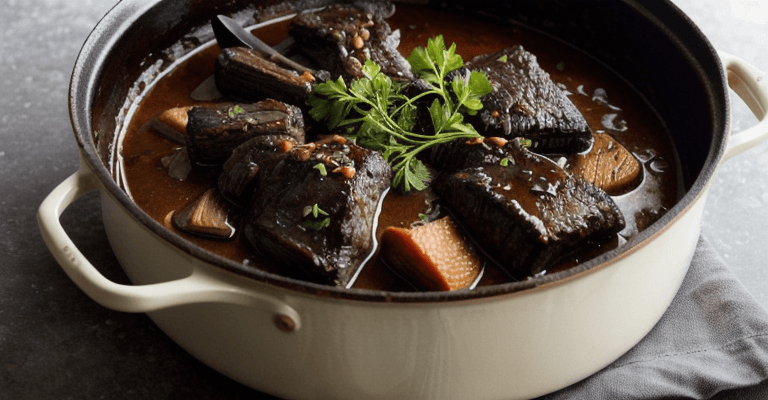
Best Braising Cuts — Selection Data
Not all tough cuts braise equally. Collagen content, fat marbling, and muscle fiber orientation all matter.
| Cut | Collagen % (of total protein) | Intramuscular Fat % | Ideal Braising Temp | Ideal Time | Liquid Ratio (liquid:meat by weight) |
|---|---|---|---|---|---|
| Beef short ribs | 28% | 18% | 82°C | 3.5 hours | 0.5:1 |
| Beef chuck roast | 22% | 12% | 80°C | 4 hours | 0.6:1 |
| Oxtail | 35% | 15% | 85°C | 4 hours | 0.7:1 |
| Pork shoulder | 20% | 16% | 82°C | 5 hours | 0.5:1 |
| Lamb shanks | 30% | 10% | 80°C | 3.5 hours | 0.6:1 |
| Veal osso buco | 26% | 8% | 78°C | 2.5 hours | 0.6:1 |
| Chicken thighs (bone-in) | 15% | 11% | 78°C | 1.5 hours | 0.4:1 |
| Beef brisket (point end) | 24% | 20% | 82°C | 5 hours | 0.5:1 |
Liquid ratio matters more than most recipes acknowledge. Too much liquid dilutes flavor and creates a thin, watery sauce. Too little causes uneven cooking and scorching on exposed surfaces. The ratios above assume the liquid comes roughly halfway up the meat — the steam trapped under the lid does the rest.
Braising Liquid Composition
The liquid is not just a cooking medium — it is a flavor delivery system. Acids tenderize surface proteins, wine contributes depth through reduced tannins, and stock adds body through its own dissolved gelatin.
| Component | Proportion of Total Liquid | Function | pH Effect | Notes |
|---|---|---|---|---|
| Stock (bone broth) | 50-65% | Body, gelatin, umami | 6.5-7.0 | Homemade preferred; commercial stock often lacks gelatin |
| Wine (red or white) | 20-30% | Acidity, tannin complexity, aroma | 3.2-3.8 | Must be reduced by half before adding to braise to eliminate raw alcohol harshness |
| Tomato (paste or crushed) | 5-10% | Acidity, color, umami (glutamate) | 4.2-4.6 | 2 tbsp paste per 500ml liquid is the upper limit before it dominates |
| Aromatics liquid (sauteed mirepoix fond) | 5-10% | Sweetness, depth | 5.5-6.0 | Deglaze the sauteed vegetables to capture fond |
| Acid (vinegar or citrus) | 1-3% | Brightness, surface tenderization | 2.4-3.0 | Add at the end; prolonged cooking destroys volatile acids |
Wine Reduction Protocol
Raw wine added directly to a braise produces a harsh, tannic, slightly metallic flavor. The alcohol (12-14% ABV) needs to boil off before it can integrate. Reduce wine in the empty braising vessel after searing and removing the meat:
- Deglaze with wine over high heat
- Reduce by 50% (2-3 minutes at full boil for 250ml)
- The liquid should coat the back of a spoon lightly
- Add stock and remaining liquid, then return the seared meat
Why You Sear First — Maillard in Wet Environments
Searing before braising is not about “sealing in juices” — that is a myth traceable to Justus von Liebig’s 1850 claim, debunked repeatedly since. Searing creates flavor through the Maillard reaction, which requires:
- Surface temperature above 140°C (ideally 155-175°C)
- Low water activity at the surface (below 0.6 aw)
- Amino acids and reducing sugars present on the meat surface
| Surface Condition | Surface Temp Achieved | Maillard Intensity | Flavor Compounds Generated |
|---|---|---|---|
| Wet, straight from package | 100°C (boiling point ceiling) | None | Zero — steam prevents browning |
| Patted dry, no oil | 155°C | Moderate | ~200 volatile compounds |
| Patted dry, 15ml high-smoke oil | 170°C | High | ~400 volatile compounds |
| Patted dry, dusted with flour | 175°C | Very high | ~600 volatile compounds (flour adds reducing sugars) |
The flour dusting technique is not just traditional — it is chemically optimal. The starch provides additional reducing sugars for Maillard reactions and later helps thicken the braising liquid.
Once the meat enters the braising liquid, the surface temperature drops to 100°C maximum. No further Maillard browning occurs during the braise. All crust flavor must be established during the sear.
Vessel Selection — Performance Comparison
The vessel determines temperature stability, evaporation rate, and how much attention the braise demands.
| Vessel | Material Temp Range | Thermal Mass (heat retention) | Evaporation Rate | Even Heating | Best For |
|---|---|---|---|---|---|
| Enameled Dutch oven (5.5L) | 80-95°C (oven at 150°C) | Very high — 4.5kg cast iron body | 8-12% per hour | Excellent with oven | Classic braises, 2-5 hour cooks |
| Bare cast iron Dutch oven | 80-95°C (oven at 150°C) | Very high — reactive surface | 10-15% per hour | Excellent with oven | Non-acid braises only (acid leaches iron) |
| Slow cooker (Low setting) | 85-90°C liquid temp | Low — thin ceramic insert | 2-4% per hour (sealed lid) | Poor — hot spots at heating element | Unattended 8-10 hour cooks |
| Slow cooker (High setting) | 95-100°C liquid temp | Low | 5-8% per hour | Poor | Not recommended — too hot, narrow window |
| Pressure cooker (15 PSI) | 121°C liquid temp | Medium | 0% (sealed) | Good | Speed braises — 45 min replaces 3.5 hours |
| Pressure cooker (10 PSI) | 115°C liquid temp | Medium | 0% (sealed) | Good | Slightly gentler; 60 min replaces 3.5 hours |
The Dutch oven in a 150°C oven is the gold standard because the oven provides even, surrounding heat — no hot spots, no scorching on the bottom. Stovetop braising requires more attention because the heat source is directional (bottom only), creating a temperature gradient of 15-25°C between the bottom and top of the liquid.
Pressure cookers produce results in a fraction of the time, but the accelerated collagen conversion at 121°C gives you a narrower window. Overcooking by 15 minutes in a pressure cooker causes the same damage as overcooking by 45 minutes in a Dutch oven.
Altitude Adjustments
Water boils at lower temperatures at altitude, which affects braising in uncovered or loosely covered vessels. It also affects pressure cooker performance.
| Altitude | Boiling Point | Oven Temp Adjustment | Pressure Cooker Note |
|---|---|---|---|
| Sea level | 100°C | None — use 150°C oven | Standard 15 PSI = 121°C |
| 600m (2,000 ft) | 98°C | Increase to 155°C | Add 5% more time |
| 1,200m (4,000 ft) | 96°C | Increase to 160°C | Add 10% more time |
| 1,800m (6,000 ft) | 94°C | Increase to 165°C | Add 15% more time |
| 2,400m (8,000 ft) | 92°C | Increase to 170°C | Add 20% more time |
The oven temperature increase compensates for faster evaporation at lower atmospheric pressure. More aggressive evaporation concentrates flavors but also risks drying the braise if the lid seal is poor.
Troubleshooting — Diagnosing by Symptoms
| Symptom | Cause | What Happened | Fix |
|---|---|---|---|
| Meat is dry and stringy | Overcooked past gelatin window | Muscle fibers contracted and expelled moisture; gelatin already dissolved into liquid | Cannot be reversed. Shred the meat and return it to the reduced sauce — the sauce gelatin re-coats the fibers |
| Meat is tough and chewy | Undercooked — collagen not yet converted | Internal temp was below 75°C or time was insufficient | Return to oven for 45-60 more minutes |
| Sauce is thin and watery | Too much liquid or insufficient reduction | Gelatin diluted below thickening threshold (~3% concentration) | Remove lid, raise oven to 180°C, reduce sauce by 30-40% |
| Sauce is bitter | Wine not reduced before braising, or burnt fond | Raw tannins or carbonized sugars from the sear | Add 1 tsp sugar and 1 tbsp vinegar — the acid-sugar combination masks bitterness |
| Meat has metallic taste | Acid + bare cast iron or aluminum vessel | Acidic liquid dissolved metal ions | Use enameled or stainless-lined cookware for tomato or wine braises |
| Uneven doneness | Stovetop hot spots or meat not submerged evenly | Temperature gradient across vessel | Switch to oven method; ensure meat pieces are similar size |
The single most common braising failure is impatience — pulling the braise 30 minutes too early because the surface looks done. Probe the thickest part of the meat. If it does not slide off a fork with zero resistance, it needs more time. The collagen-to-gelatin conversion has a clear before-and-after, and there is no partial credit.
Gelatin Concentration and Sauce Body
The gelatin dissolved from collagen during braising is what gives a great braising sauce its body — the way it coats a spoon and clings to the meat. Below 2% gelatin concentration, the sauce is thin and watery. Above 4%, it sets to a solid jelly when chilled. The target for serving consistency is 2.5–3.5%.
| Gelatin Concentration in Liquid | Behavior at 70°C (serving) | Behavior at 4°C (chilled) | Sauce Quality |
|---|---|---|---|
| Below 1% | Thin, watery, runs off spoon | Stays liquid | Poor — add more collagen-rich cuts or reduce liquid |
| 1–2% | Slightly viscous | Barely gels | Acceptable — reduce by 20% to concentrate |
| 2.5–3.5% | Coats spoon, clings to meat | Sets to soft jelly | Optimal — this is the target |
| 4–6% | Thick, syrupy | Firm jelly, bounces | Rich — great for ragu, may need thinning for braises |
| Above 6% | Gluey, sticky | Very firm set | Over-reduced — thin with stock before serving |
To increase gelatin concentration: reduce the sauce (remove lid, raise oven to 180°C) or add collagen-rich ingredients to the braise — a split pig’s foot, chicken feet (2 per braise), or veal demi-glace (2 tablespoons).
Braising Liquid pH and Tenderization Rate
Acidic braising liquids accelerate collagen conversion. A braise with wine (pH 3.5) converts collagen 15–20% faster than one with plain stock (pH 6.8). But excessive acid below pH 3.0 denatures muscle proteins too aggressively, creating a mushy, mealy texture on the meat surface while the interior remains tough.
| Braising Liquid pH | Collagen Conversion Speed | Meat Surface Texture | Recommended Use |
|---|---|---|---|
| 6.5–7.0 (plain stock) | Baseline | Clean, firm surface | Delicate braises — veal, chicken |
| 5.0–6.0 (stock + tomato) | +10% faster | Slight surface softening | All-purpose — beef, lamb |
| 3.5–5.0 (stock + wine, reduced) | +15–20% faster | Moderate surface tenderization | Robust braises — short ribs, oxtail |
| Below 3.0 (excess vinegar/wine) | +30% faster but problematic | Mushy, grainy surface | Avoid — reduce wine first to concentrate flavor and raise pH |
Resting and Serving Protocol
Braised meat benefits from resting in its liquid for 20-30 minutes off heat. During this period, the muscle fibers reabsorb some of the surrounding gelatin-rich liquid, improving moisture and flavor distribution.
For the best results on multi-day braises: cool the entire braise to room temperature within 2 hours (per USDA food safety cooling requirements), then refrigerate overnight. The next day, the fat solidifies on top and can be lifted off cleanly. Reheat gently at 150°C for 30-45 minutes. Braised dishes almost universally taste better the second day — the overnight rest allows flavor molecules to penetrate deeper into the muscle fibers, and the sauce gels firmly from the dissolved gelatin.
Quick Reference Summary
| Cut | Liquid level | Temperature | Time | Done indicator |
|---|---|---|---|---|
| Beef chuck/short ribs | 1/2 to 2/3 up meat | 150°C (300°F) oven | 2.5-3.5 hours | Fork-tender, 93°C (200°F) internal |
| Pork shoulder | 1/2 up meat | 150°C (300°F) | 3-4 hours | Pulls apart easily |
| Lamb shanks | 2/3 up meat | 160°C (325°F) | 2-3 hours | Bone wiggles freely |
| Chicken thighs | 1/3 up meat | 160°C (325°F) | 1-1.5 hours | 88°C (190°F) internal |
| Oxtails | 2/3 up meat | 150°C (300°F) | 3-4 hours | Gelatin-rich, falling off bone |
Decision rule: Collagen-to-gelatin conversion requires sustained temperature above 71°C (160°F) internal. Low oven temperature (150-160°C) prevents the liquid from boiling, which toughens protein.
How to apply this
Use the recipe-scaler tool to adjust portions to scale ingredient quantities based on the data above.
Start with the reference tables above to identify the correct parameters for your specific ingredient or technique.
Measure your key variables (temperature, weight, time) before beginning — precision prevents waste.
Check the comparison tables to select the best approach for your situation and equipment.
Adjust quantities using the recipe-scaler when scaling up or down from the tested ratios.
Test with a small batch first, using the exact measurements from the tables before committing to full volume.
Verify your results against the expected outcomes listed in the quick reference section.
Honest Limitations
Braising times are highly variable — meat from older animals, larger cuts, and different breeds require different durations. “Fork-tender” is subjective; an instant-read thermometer at 93°C (200°F) is more reliable. Dutch oven material and fit affect evaporation rate — a loose-fitting lid requires more liquid. Stovetop braising requires more monitoring than oven braising due to uneven heat. This guide covers traditional braising; pressure cooker braising follows different time/temperature relationships. Wine and acidic braising liquids affect collagen breakdown rate, which is not fully captured in the time table.
